Google Ads Automated Rules

Today I want to talk about automated rules inside Google ads and why you would want to use them and how they can help you manage your account.
And then I'm going to briefly show you where to go to set your rules up.
Automated rules: what are they and why would you need to use them?
Automated rules inside Google ads allow you to perform certain tasks automatically. They also allow you to send an email when specific conditions are met inside your account. So there are two reasons that you might want to use automated rules:
- To perform certain tasks inside your account based on a set of criteria (eg pausing or enabling ads/keywords/campaigns; adjusting bids or budgets)
- To set up an email alert when (usually) something goes wrong or a metric exceeds your desired parameters.
Both can be very helpful.
There are certain limitations in that these automated rules only run once a day, but if you have no other tool to send this kind of alert it’s certainly better than nothing.
How to access Automated Rules
When you’re inside the campaign, ad group or keyword dashboard you can access automated rules by clicking on the traffic light symbol at the top right.

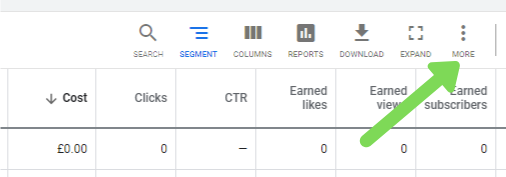
You can also, you can also access them via the spanner menu at the very top right of any page in your account.

From this menu you all the rules that you have already set up. You can also see the history of when your rules have run along with their results.
How can You Use Automated Rules?
The following is taken from Google’s support article (https://support.google.com/google-ads/answer/2497710?hl=en-GB&ref_topic=3122862) and outlines all the ways you can use rules:
Schedule ads
• Turn on or off several special ads for a promotional event
• Turn on or off several special ads on a repeating basis (e.g. every weekend)
• Turn on or off a special ad campaign for a promotional event
Pause low-performing ads or keywords
• Pause low-performing keywords based on performance metrics (e.g. high cost per conversion)
• Pause low-performing ads based on performance metrics (e.g. low CTR)
Bids and bid scheduling
• Adjust bids for keywords based on cost per conversion
• Change bids to target an average position (Search Network only)
• Raise bids to ensure that ads show on the first page (Search Network only)
• Raise bids to the recommended top of page bid (Search Network only)
• Bid scheduling (e.g. a higher bid during certain hours of the day)
Control budgets and cost
• Checking in on your budget
• Budget scheduling (e.g. higher budget on certain days of the week)
• Pause campaigns that have spent a certain budget part of the way through the month
• Pause campaigns that have reached a certain number of clicks part of the way through the day
• Increase budget for campaigns that convert well (using cost per conversion)
• Increase bids for dimensions that perform well in your Display Network campaign
But as I’ve mentioned already you might also want to use it as an alert system to notify you when impressions suddenly drop, or budgets are overspending.
Creating A New Rule
You can create a new rule either from the rules area in the Tools & Settings menu or from with campaigns, ad groups, keywords etc dashboards.
Step1: Choose what type of rule to create – in this case we’re looking at ad group rules:

Step 2: Select which ad groups on which to apply the rule:

Step 3: Define the conditions must be met in order for the rule to run:

When you click on the ‘+ADD’ link you’ll get the following options:

You can select one or multiple conditions that need to be met.
Step 4: Say how often you want the rule to run, and what data range you want it to look at:

Frequency can be:
• Once
• Daily
• Weekly
• Monthly
Data from range can be:
• Same Day
• Previous day
• Same week
• Previous week
• Previous 7 days
• Previous 14 days
• Same month
• Previous month
• Previous 30 days
• Previous 60 days
• Previous 90 days
• All time
Step 5: Set your email options and name your rule:

I would recommend that you ask for an email to be sent for any new rules so you can check it’s doing what you want it to. If it’s a regular rule you can stop emails as long as you’re happy it’s working properly and are monitoring results to make sure things aren’t going awry as a result.
Categories: : Google Ads
Get A Free Account Review
Discover the hidden gold in your Google Ads Account
Submit your details below and we'll be in touch to arrange the review
 Sara Jones